
Step-by-Step Guide to Needle Injector Embalming
Understanding Needle Injector Embalming Techniques
Needle injector embalming is a technique used by funeral professionals to secure the mouth closure during the embalming process. For those seeking quick information:
| Needle Injector Embalming | Key Facts |
|---|---|
| Purpose | Secures mouth closure during embalming |
| Equipment Needed | Needle injector device, two stainless/brass needles |
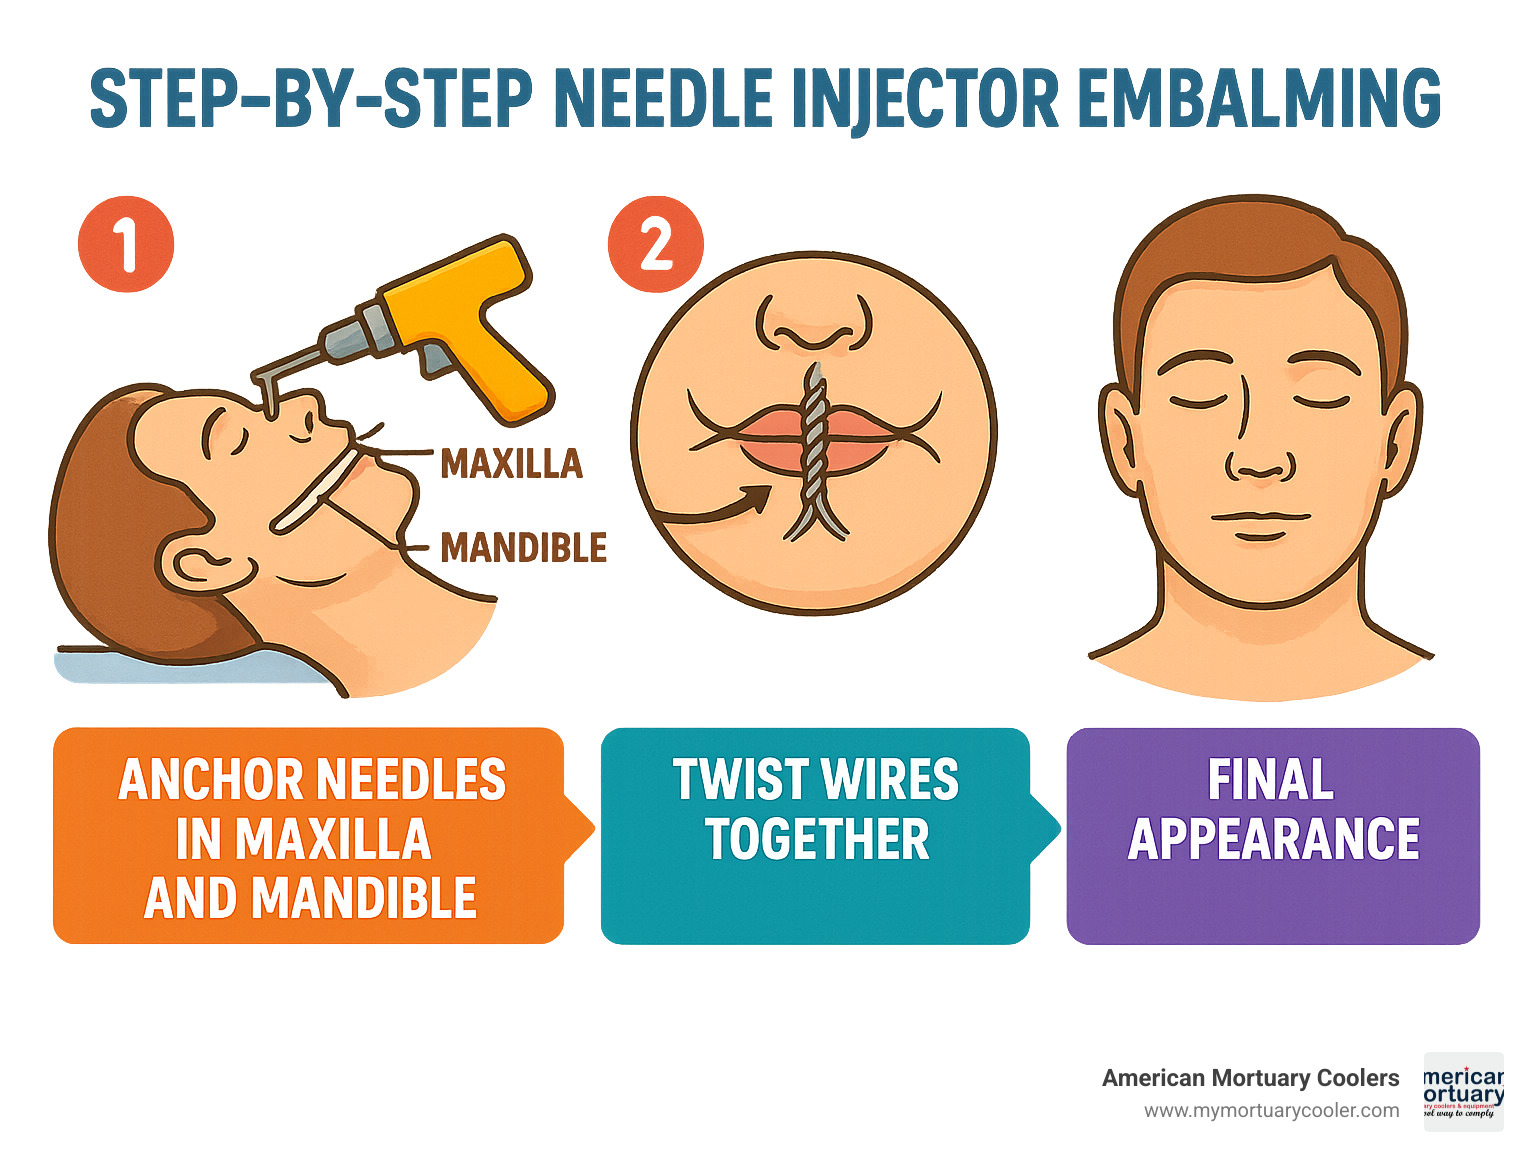
| Process | Anchors one needle into maxilla, one into mandible, wires twisted together |
| Benefits | Faster than suturing, creates natural appearance, prevents leakage |
| Average Time | 2-3 minutes for experienced embalmers |
The needle injector has become the most commonly used procedure for mouth closure in the United States due to its speed and efficiency. Unlike traditional suturing methods that can be time-consuming, the needle injector requires only two needles per procedure—one anchored into the maxilla (upper jaw) and one into the mandible (lower jaw).
When performed correctly, this technique creates a natural-looking closure without puckering or distortion of the lips and surrounding tissues. The procedure is not only faster than alternative methods but also helps prevent leakage, which is crucial considering that as much as 50% of drainage during embalming can be arterial solution.
Beyond mouth closure, needle injectors serve additional purposes in the preparation room, including dressing skull fractures and other repairs that require secure anchoring of tissue.
My name is Mortuary Cooler, and I've spent over two decades working with funeral professionals nationwide to optimize their preparation rooms with proper equipment, including teaching best practices for needle injector embalming techniques. The right tools and techniques ensure dignity in presentation while maintaining an efficient workflow in your preparation room.
Needle Injector 101: Definition, Components, History
When you walk into any well-equipped preparation room in America, chances are you'll spot a needle injector sitting ready for use. This deceptively simple tool has revolutionized how funeral professionals approach one of the most visible aspects of their craft – creating a natural, peaceful expression for the deceased.
A needle injector embalming tool is essentially a specialized device designed to secure mouth closure by anchoring wired needles into the jaw structure. While it might look intimidating to the uninitiated, its genius lies in its straightforward functionality.
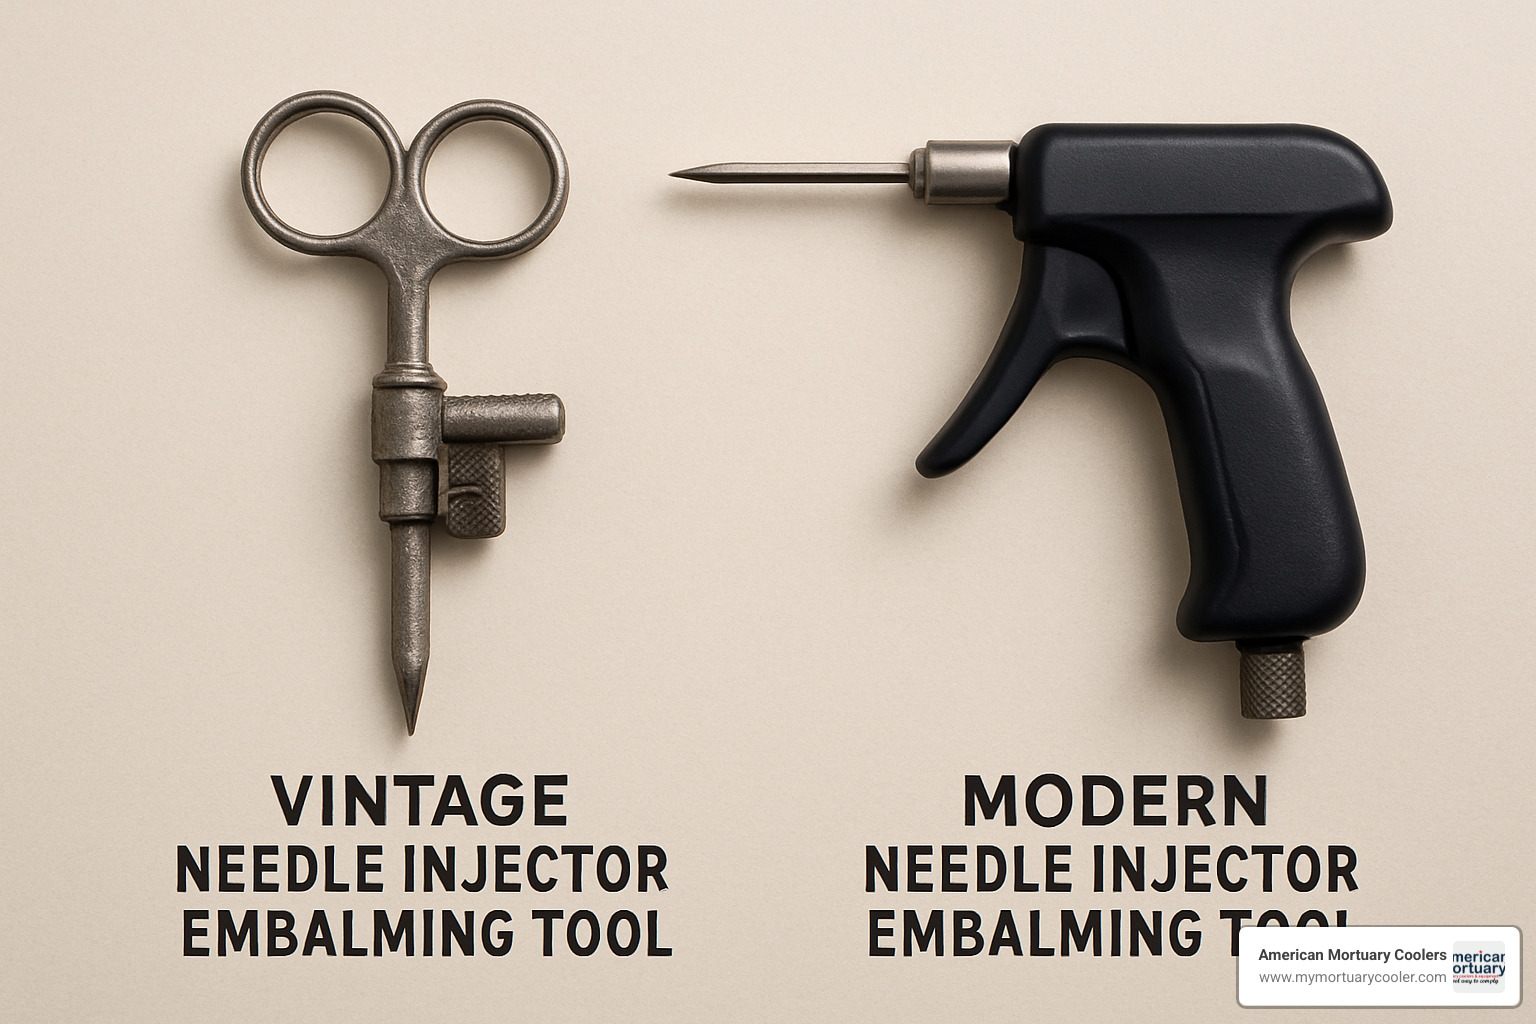
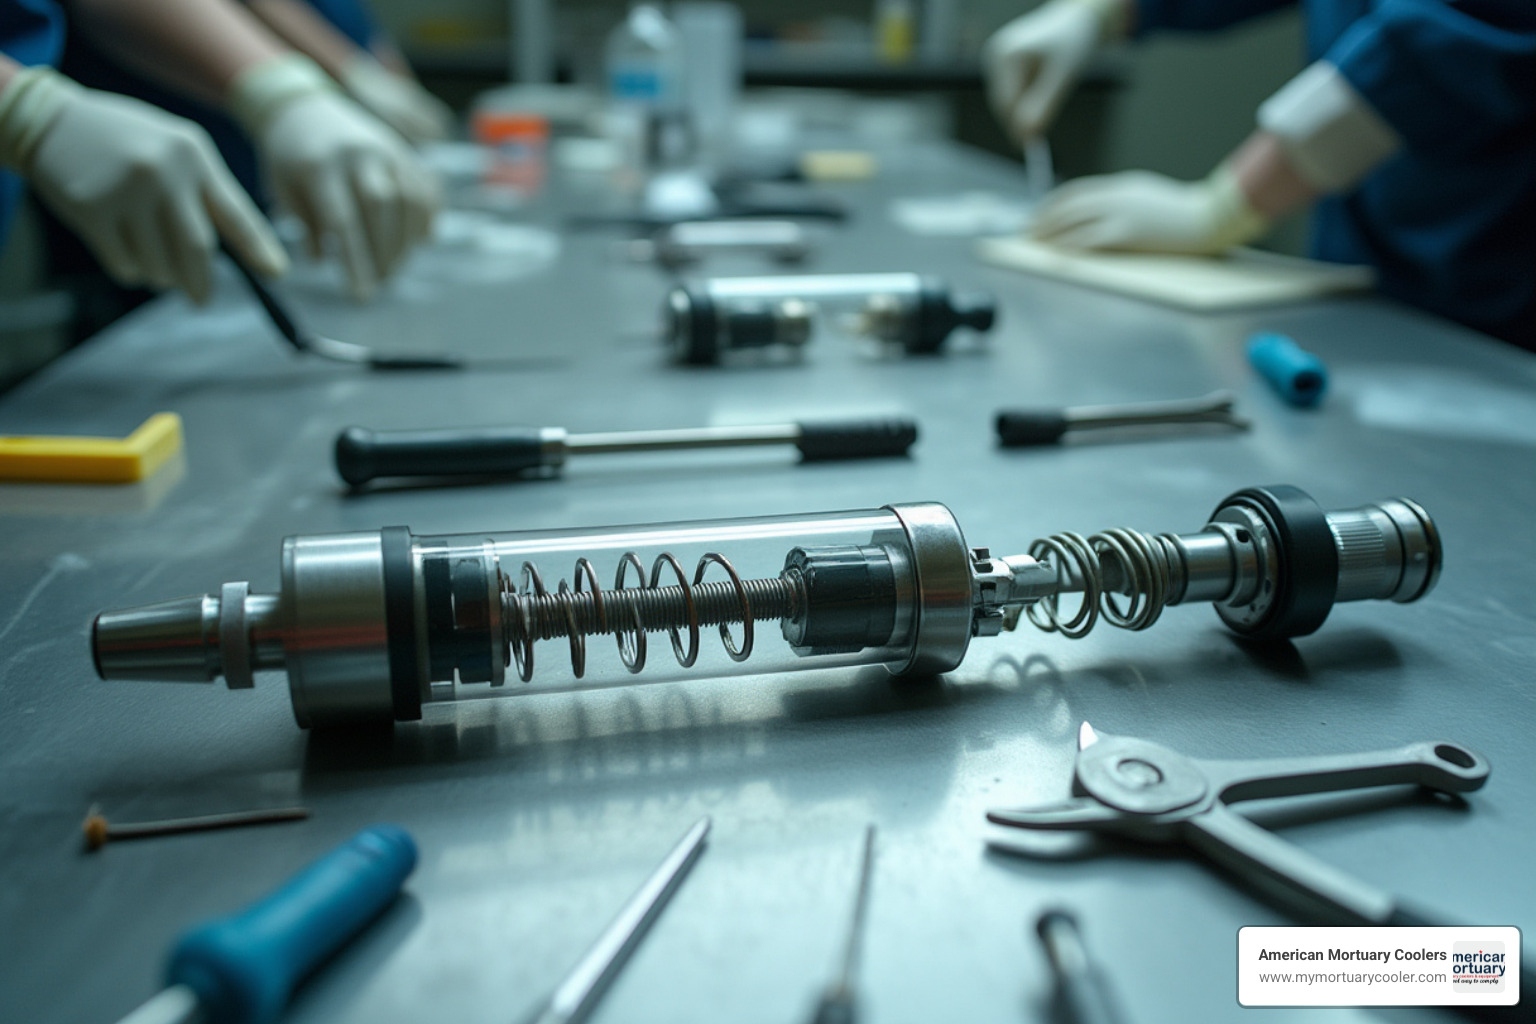
The modern needle injector consists of several key components working together in harmony. Most feature either a comfortable pistol-grip or traditional two-ring handle design that fits naturally in your hand. Inside, a precision-engineered spring-loaded firing mechanism delivers consistent force with each use. The business end accommodates specialized stainless steel or brass needles, each with attached wire for securing the closure. Many newer models also include a locking trigger system to prevent accidental discharge.
"I couldn't imagine working without my needle injector," shares a veteran embalmer from our Johnson City, TN location. "It's been a staple in preparation rooms for decades because of its reliability and the natural appearance it creates."
The magic happens through a remarkably simple spring mechanism. When triggered, the device drives the needle with just enough force to penetrate the maxilla (upper jaw) or mandible (lower jaw) at precisely the right anchor points. This creates a secure foundation for the wire closure that maintains the deceased's natural expression.
Historical Development
The journey of the needle injector through funeral service history reflects our industry's constant pursuit of dignity, efficiency and natural presentation:
1940s-1950s: The earliest manual models featured a basic two-ring design that required significant hand strength and precision. These pioneering tools were but demanded considerable skill.
1960s-1970s: Improved spring mechanisms transformed reliability and dramatically reduced misfires, making the tool more accessible to all embalmers regardless of physical strength.
1980s-1990s: The introduction of the ergonomic pistol-grip design improved handling, accuracy, and reduced hand fatigue during long preparation sessions.
2000s-Present: Today's electric models and advanced Posi-Lock trigger systems provide unprecedented control and consistency, making the learning curve gentler for new professionals.
Interestingly, regional preferences around the world show distinct patterns in needle injector usage. While it's the go-to method throughout the United States, many European funeral homes still prefer traditional suturing techniques. In certain Asian markets, specialized variants of the injector have emerged to accommodate cultural preferences and practices.
Our technical specialist from Dallas explains it perfectly: "What makes the modern needle injector so valuable is the balance between simplicity and effectiveness. The design is straightforward enough that it doesn't require complex maintenance, yet sophisticated enough to create a secure, natural-looking closure."
For those looking to explore needle injector options, Embalming Supply Company offers a comprehensive selection of needle injectors and trocar buttons. For a broader understanding of preparation room tools, Tool Talk: A Deep Dive into Mortuary Tools provides valuable context about how the needle injector fits into the complete toolkit of the modern embalmer.
Benefits, Use Cases, and Comparison with Other Closure Techniques
When it comes to creating a dignified final appearance, needle injector embalming stands out as a game-changer in the preparation room. Let's explore why this technique has become the preferred method for so many funeral professionals across the country.
Key Benefits
The popularity of needle injectors isn't just about tradition – there are practical advantages that make them the go-to choice for busy preparation rooms.
Most embalmers appreciate the incredible time efficiency – a skilled professional can complete a mouth closure in just 2-3 minutes with a needle injector, while traditional suturing might take 10 minutes or more. This time-saving aspect alone makes a significant difference when preparing multiple cases in a day.
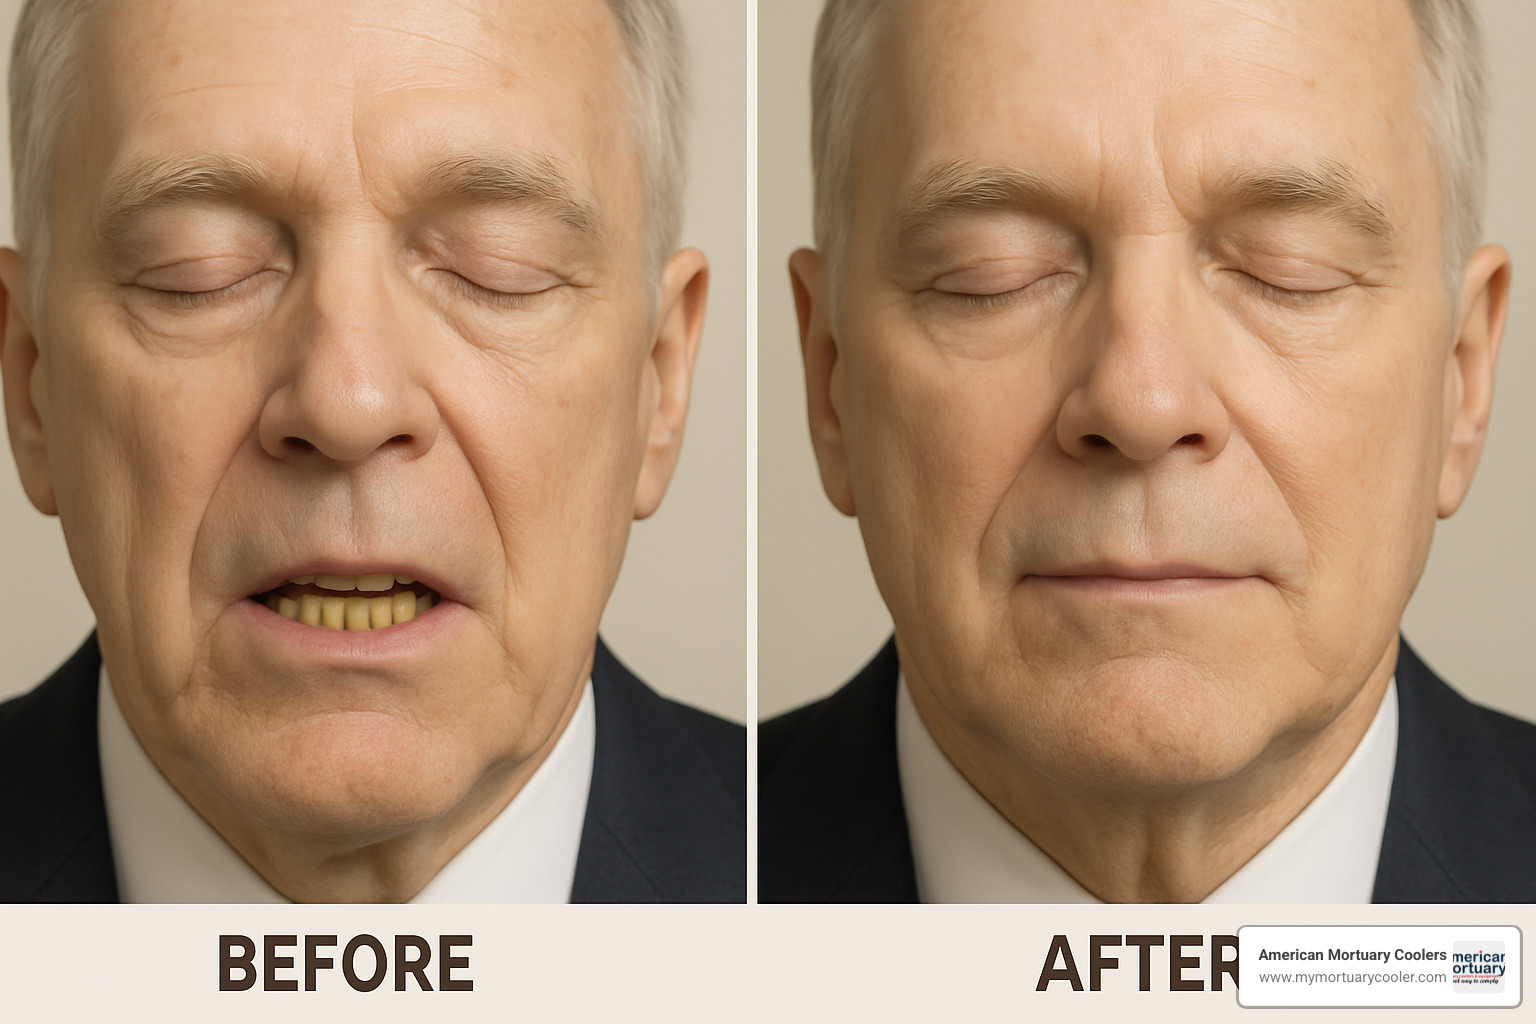
Beyond speed, the secure seal created by properly anchored needles prevents embarrassing leakage during the embalming process. The technique also produces a remarkably natural appearance with no visible puckering or distortion of the lips – something families notice and appreciate, even if they don't realize the technical skill behind it.
"I switched to needle injectors after my first year in the profession," shares Mark, a funeral director who regularly orders supplies from our Tennessee warehouse. "The difference in presentation quality is night and day, and I can't imagine going back to the old methods. Families notice that natural look, even if they don't know why."
Common Use Cases
While creating a natural mouth closure is the primary application for needle injector embalming, this versatile tool proves valuable in several challenging scenarios that funeral professionals face regularly.
In trauma cases, the needle injector can help secure fractured facial bones or damaged tissue, providing stability during reconstruction. For autopsy cases, it helps reestablish facial structure after invasive procedures. The durability of the closure also makes it ideal for long-term preservation situations, such as when a body needs to be transported across state lines or when extended viewing periods are requested.
Limitations and Contraindications
Despite its many advantages, the honest truth is that needle injector embalming isn't appropriate for every situation. Being aware of these limitations helps funeral professionals make informed decisions about the best techniques for each unique case.
Pediatric cases require special consideration due to the delicate bone structure of infants, which may not support the needle anchoring. Similarly, edentulous cases (those without teeth) may present challenges for secure placement, often requiring modified techniques or alternative methods entirely.
Cases involving severe facial trauma sometimes necessitate more comprehensive reconstruction techniques before a needle injector can be effectively employed. Additionally, some religious traditions have specific requirements that prohibit certain invasive preparation procedures, requiring alternative approaches.
Comparison with Alternative Methods
| Technique | Average Time | Skill Level | Appearance | Durability | Best For |
|---|---|---|---|---|---|
| Needle Injector | 2-3 minutes | Moderate | Natural | Excellent | Standard cases, time efficiency |
| Suturing | 10-15 minutes | Advanced | Variable | Very good | Complex cases, edentulous |
| Adhesives | 5-7 minutes | Basic | Good | Fair | Minimal intervention, religious restrictions |
| Screw Devices | 7-10 minutes | Advanced | Good | Excellent | Long-term preservation, shipping |
"What I tell funeral directors who are setting up a new preparation room," explains our equipment specialist from American Mortuary Coolers, "is that while the needle injector will handle 80-90% of your cases beautifully, it's smart to have alternatives on hand. It's like having the right tools in your toolbox – you want options for those special circumstances."
For those interested in exploring more about essential embalming supplies, our article on Everything You Need to Know About Embalming Supplies provides a comprehensive overview of the tools that make a well-equipped preparation room function efficiently.
Step-by-Step Guide to Needle Injector Embalming
Let's walk through the art of needle injector embalming together. I've spent years training funeral professionals across the country, and I can tell you that this technique is equal parts science and craftsmanship. With some practice and attention to detail, you'll be achieving natural, dignified results every time.
Pre-Procedure Checklist for Needle Injector Embalming
Before you begin, take a moment to gather everything you'll need. Trust me, there's nothing worse than being elbow-deep in a procedure and realizing something essential is across the room!
Your personal protection comes first – gloves, eye protection, apron, and appropriate face covering should already be on. This isn't just about compliance; it's about your health and safety.
For the procedure itself, you'll need your needle injector (whether you prefer manual or electric), two fresh needles (stainless or brass both work beautifully), small scissors for wire trimming, cotton rolls for positioning, and your favorite massage cream or Inr-Seel putty for sealing.
Make sure your preparation room lighting is focused properly on the facial area. I always tell the professionals I train: "Good lighting isn't a luxury – it's the difference between good work and great work." Position the deceased comfortably on the embalming table with the head slightly liftd if needed.
Needle Injector Embalming: Firing the Needles
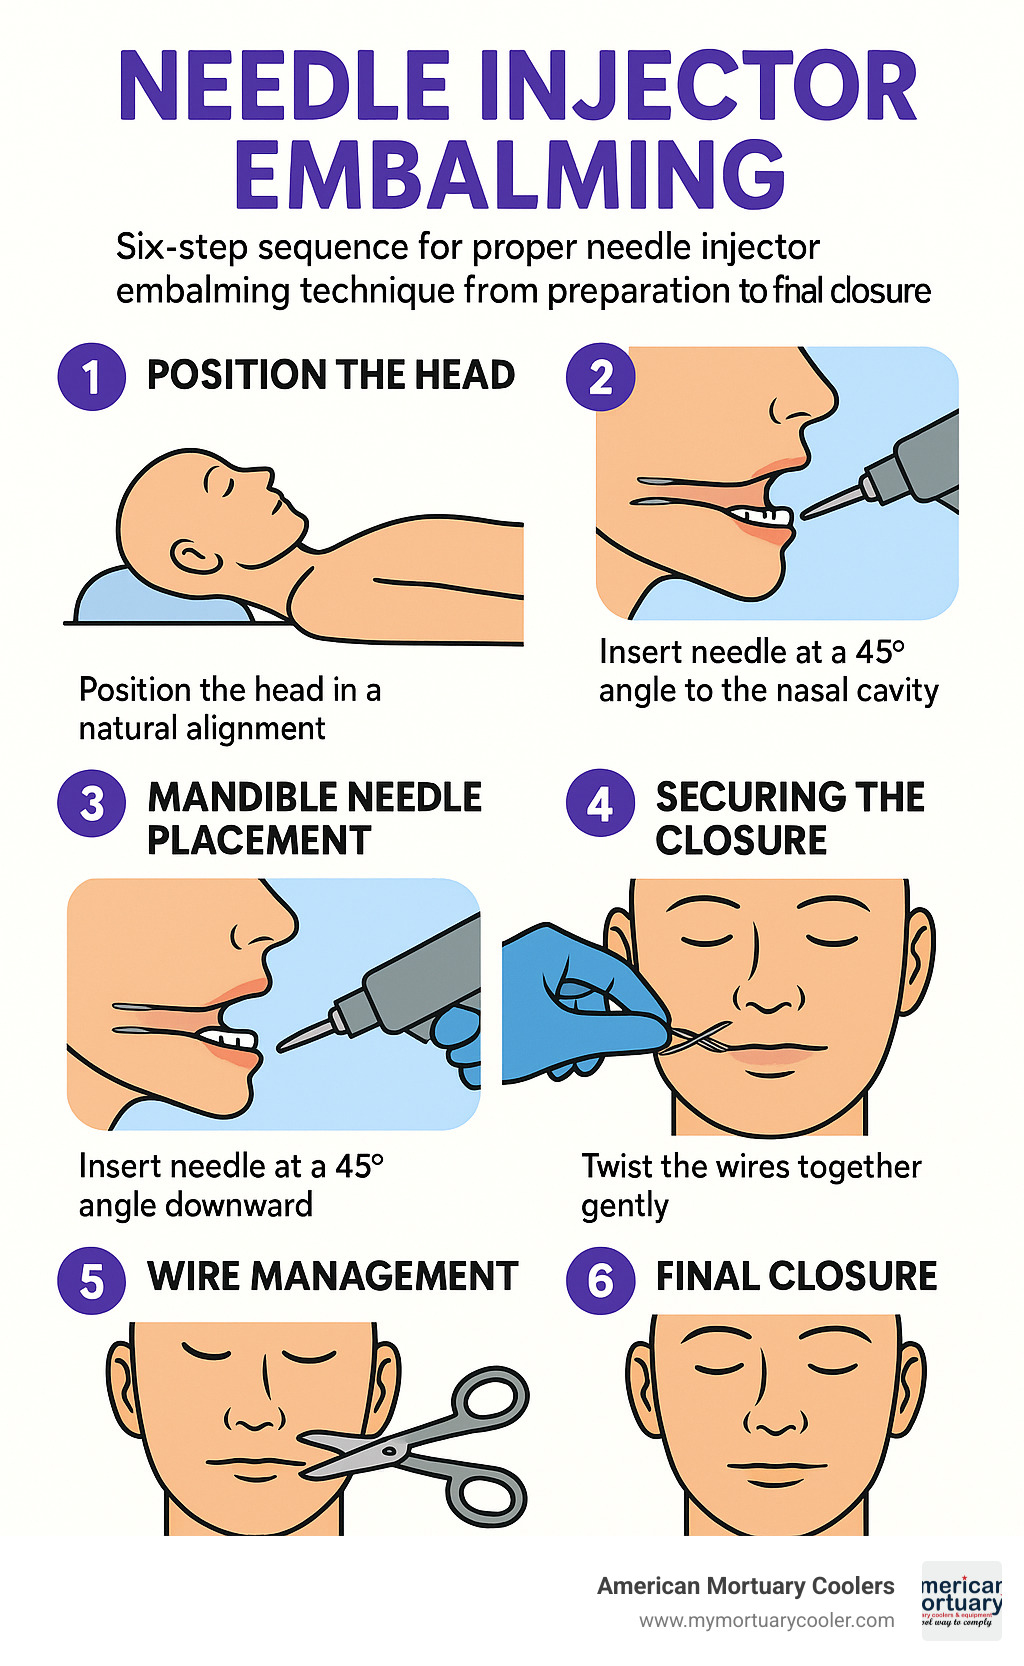
Now for the core technique. Begin by positioning the head naturally – no excessive tilting or straining. The jaw should rest in a closed position that looks relaxed, not clenched or slack.
For the maxilla (upper jaw) placement, locate that pronounced cartilage ridge just above the upper front teeth. You're looking for that sweet spot where the needle will anchor securely. Position your injector at roughly a 45-degree angle pointing toward the nasal cavity. Place it firmly against the tissue – not jabbing, but with confident pressure – and squeeze the trigger.
"I always tell my students to imagine you're placing the needle, not shooting it," shares one of our experienced trainers from our Tennessee headquarters. "It's a gentle, controlled motion, not a forceful one."
For the mandible (lower jaw), find the cartilage below the lower incisors. Again, position at about a 45-degree angle, this time pointing downward. Place firmly and trigger the injector.
Once both needles are securely placed, gently bring the protruding wires together and twist them to create the perfect closure tension. This is where experience really shows – too tight creates an unnatural grimace, too loose defeats the purpose.
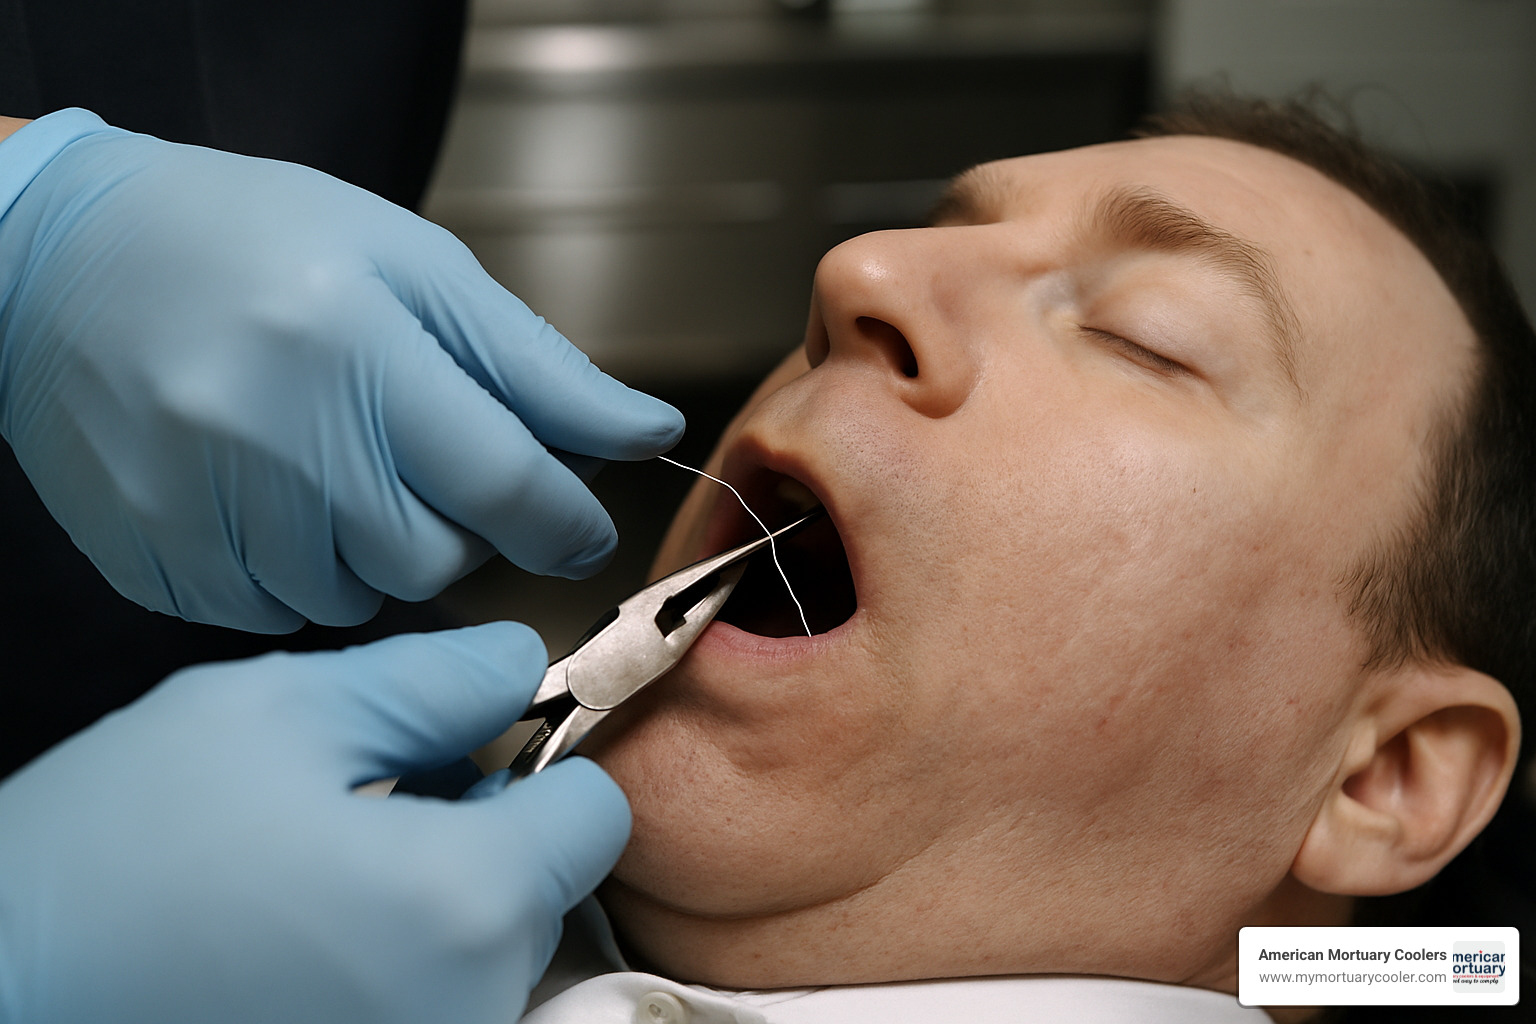
The entire sequence should flow smoothly with practice:
Finishing Touches and Aesthetic Tips for Needle Injector Embalming
The difference between adequate work and exceptional work often comes down to these final steps.
Once you've achieved the perfect tension with your twisted wires, snip the excess with your scissors and gently tuck what remains under the lips. Take a moment to feel for any sharp edges or points that might later puncture the skin – this small detail makes a world of difference.
Next, apply a thin bead of Inr-Seel or similar sealing compound along the inside of the lips. Press them together gently to create that natural seal we're looking for. Wipe away any excess that might be visible – remember, our goal is for the family to never notice our technical work, only the peaceful result.
Moisturizing is crucial for preventing that dried, cracked appearance of the lips. I'm particularly fond of Kalon Massage Cream, but use whatever quality product you prefer in your preparation room. Apply it gently to maintain tissue hydration.
Before you consider the job complete, step back and perform a final inspection. Look for any potential leakage points, check that the expression appears natural and peaceful, and make any small adjustments needed to the lip position or tension.
"In my thirty years of experience," says our specialist from Memphis, "I've never regretted taking that extra minute for final adjustments, but I've certainly regretted rushing through them."
Troubleshooting & Common Mistakes
Even the most experienced professionals encounter challenges with needle injector embalming from time to time. Here's how to address the most common issues:
When you experience a needle misfire, it's typically due to insufficient pressure or a worn spring mechanism. Reset your injector, check that spring tension, and try again with slightly firmer pressure.
Broken needles usually happen when you hit bone instead of cartilage or apply excessive force. If this happens, carefully remove any fragments and select a new entry point slightly offset from your original attempt.
Edentulous cases present their own challenges due to the lack of supporting structure. Try using a shallower angle for your needle placement, add cotton support behind the lips, or consider alternative closure methods if needed.
Wire breakage typically results from excessive twisting or using needles with thin wire gauge. Use pliers for more controlled twisting and consider switching to stronger wire gauge needles if you encounter this problem frequently.
If you step back and notice an unnatural appearance, it's usually from excessive tension or asymmetrical placement. Don't hesitate to release and reposition – the family will never know you needed a second attempt, but they will notice a perfect final result.
Many of the funeral professionals we work with at American Mortuary Coolers find it helpful to practice on a simple plywood board before working on actual cases. This builds muscle memory and technique without any pressure.
Needle injector embalming is a skill that improves with practice and attention to detail. The goal is always the same – creating a natural, peaceful appearance that helps families begin their healing journey.
Maintenance, Costs, and FAQs
Taking care of your needle injector isn't just about extending its lifespan—it's about ensuring consistent, reliable performance when you need it most. Like any quality tool in your preparation room, a little regular attention goes a long way.
Maintenance Protocol
After each procedure, give your injector a quick once-over with disinfectant wipes to remove any fluid or tissue residue. This simple habit prevents buildup that could affect performance. Take a moment to check that the spring mechanism still has proper tension.
Weekly, treat your injector to a drop of oil pen lubricant on the moving parts, followed by a test-fire to make sure everything moves smoothly. This is also a good time to check for any components that might be coming loose.
"I learned the hard way about skipping maintenance," shares one of our longtime customers from Memphis. "A needle injector that fails mid-procedure can really disrupt your workflow—and that monthly deep clean makes all the difference."
Once a month, take the time to carefully disassemble your injector according to the manufacturer's guidelines. Clean each component thoroughly and apply fresh lubricant before putting everything back together.
One important tip our equipment specialists always emphasize: never clean your needle injector in an instrument bath. The chemicals can damage the spring mechanism and significantly shorten your device's lifespan.
Cost Considerations
When it comes to investing in needle injector embalming equipment, you'll find options across several price points:
Basic manual injectors typically run $150-$200, while the more ergonomic pistol-grip models range from $190-$250. If you're looking at electric or pneumatic models for higher volume facilities, expect to invest $300-$500.
Replacement needles cost about $1-$3 each and usually come in packs. For maintenance supplies like lubricants and cleaning materials, budget around $30-$50 annually.
Many professionals ask about brass versus stainless steel needles. Brass needles cost less upfront and offer slightly more flexibility, but may need more frequent replacement. Stainless steel needles have a higher initial cost but provide better durability and penetration in challenging cases.
"I always tell folks visiting our Johnson City showroom that quality tools pay for themselves," notes our equipment specialist. "The premium injector models we carry are designed to last for years of daily use—making them the more economical choice in the long run."
For those interested in electric models, Pierce Chemical offers quality needle injectors that many of our customers have found reliable. You might also find our article on A Practical Guide to Comparing Embalming Fluid Prices helpful for budgeting your overall preparation room supplies.
FAQ #1 – Is a needle injector safe for fragile bone structures?
When working with osteoporosis cases, you'll want to use reduced spring tension if your model allows for adjustment. In some cases, you might need to consider alternative closure methods altogether.
For pediatric cases, needle injector embalming is generally not recommended. Most experienced embalmers prefer adhesive closures for these delicate situations.
With elderly decedents, take a moment to assess bone density before proceeding. You may need to modify your technique with shallower penetration to prevent fractures.
"We always emphasize that there's no shame in switching to an alternative method when the situation calls for it," says our training coordinator. "Your priority is dignity in presentation, regardless of which technique gets you there."
FAQ #2 – How many needles should I use per closure?
For standard cases, the two-needle approach—one in the maxilla (upper jaw) and one in the mandible (lower jaw)—handles most situations beautifully.
If you're preparing a body for transfer, particularly over long distances, consider using four needles for added security. The additional support helps maintain closure integrity during transportation.
In trauma cases where you're dealing with complex facial reconstruction, multiple needles may be necessary to achieve proper alignment and support.
"In my thirty years of practice, I've rarely needed more than two needles for standard preparations," shares one of our veteran customers from Knoxville. "But having the technique for four-needle closure in your back pocket is invaluable for those special cases."
FAQ #3 – Can I reuse injector needles?
This question comes up frequently in our training workshops, and our answer is consistent: manufacturers and industry best practices recommend single use only.
While thorough sterilization according to OSHA guidelines is technically possible, the practical reality is that the minor cost savings rarely justify the potential risks of cross-contamination or needle dulling.
From both a risk management and ethical standpoint, treating needles as single-use items is the professional standard we encourage. At just a few dollars per needle, the peace of mind is worth the investment.
"When families entrust their loved ones to your care, they're expecting the highest standards," our compliance specialist often reminds customers. "Using fresh, sharp needles for each case is part of honoring that trust—and it ensures consistent results in your needle injector embalming procedures."
Conclusion
Mastering needle injector embalming techniques isn't just about technical proficiency—it's about honoring the families you serve with dignity and care. Throughout this guide, we've walked through the practical aspects of this essential skill that has become the cornerstone of modern preparation.
The beauty of the needle injector lies in its neat simplicity. With just two small anchors and a twist of wire, you create a natural, peaceful expression that brings comfort to grieving families. It's remarkable how something so straightforward can make such a meaningful difference in presentation.
When I visit preparation rooms across the country, I often hear embalmers share stories about that moment when they finally mastered the needle injector technique—that satisfying click of confidence when they knew they'd found the perfect placement. These small victories in craftsmanship are what separate good preparation from truly exceptional care.
The advantages of needle injector embalming extend beyond efficiency (though saving 7-10 minutes per case certainly adds up over a career). The secure closure prevents embarrassing leakage during viewings, while the natural appearance helps families focus on their memories rather than on the preparation itself.
Your tools are extensions of your hands and your commitment to service. A well-maintained needle injector, stored properly in your preparation room alongside your other essential equipment, will serve you faithfully for years. Those few minutes of cleaning and care after each use pay dividends in reliability when you need it most.
While the needle injector works beautifully for most cases, your professional judgment remains your most valuable asset. Recognizing when a pediatric case needs a gentler approach with adhesives, or when an edentulous case might benefit from a different technique—these decisions showcase your expertise and commitment to individualized care.
At American Mortuary Coolers, we understand that quality preparation requires quality equipment. From our custom mortuary coolers to our preparation room supplies, we're committed to supporting funeral professionals with durable, thoughtfully designed solutions that make your important work a little easier.
Our team across Johnson City, Atlanta, Chicago, Columbia, Dallas, Los Angeles, New York, Pittsburgh, and beyond stands ready to help with equipment selection, maintenance advice, or troubleshooting your needle injector embalming techniques. We're just a phone call away when you need support.
Excellence in preparation is never a destination—it's a journey of continuous learning and refinement. By incorporating these techniques into your practice, you're ensuring that each family receives the highest standard of care during their most vulnerable moments.
For more information about our custom mortuary coolers and preparation room equipment, or to speak with one of our specialists about optimizing your workspace, reach out to American Mortuary Coolers today. We deliver directly to the contiguous 48 states, ensuring your preparation room is equipped with everything needed to provide exceptional, compassionate service to the families who trust you with their loved ones.


